How to Clean Your Pet’s Water and Food Bowls
Keeping your pet's food and water bowls clean is not just about aesthetics; it's about ensuring a healthy environment for your furry companions. Just like we wouldn’t want to eat from a dirty plate, our pets deserve a clean space for their meals. Regular cleaning not only prevents the build-up of harmful bacteria but also keeps your pet happy and healthy. Imagine a world where your pet eagerly approaches their eating area, tail wagging, because they know it’s a clean and safe place to dine. Sounds delightful, right? So, let's dive into the essential tips and methods for effectively cleaning your pet’s bowls!
Regularly cleaning your pet's bowls is crucial for preventing bacteria growth and ensuring your pet's health. Dirty bowls can lead to various health issues, making cleanliness a top priority for pet owners. Think about it: every time your pet eats or drinks, they might be ingesting harmful germs if their bowls are not properly maintained. This can lead to gastrointestinal issues and other health problems that could easily be avoided with a little diligence. Remember, a clean bowl is a happy bowl, and a happy bowl means a happy pet!
Selecting appropriate cleaning supplies is vital for effectively sanitizing your pet's bowls. Opt for pet-safe detergents and tools that won't harm your furry friend while ensuring a thorough clean. Look for biodegradable soaps and avoid harsh chemicals that can linger in the bowl and affect your pet’s health. Here’s a quick rundown of supplies you might consider:
- Pet-safe dish soap: Gentle on surfaces and tough on grime.
- Soft sponges: To avoid scratching the bowl surfaces.
- White vinegar: A natural disinfectant that eliminates odors.
- Baking soda: Great for removing tough stains and odors.
Establishing a daily cleaning routine for your pet's bowls helps maintain hygiene. This might sound like a chore, but it can actually be quite simple! Start by rinsing the bowls after each meal to remove food debris and any leftover water. Then, wash them with warm, soapy water, and rinse thoroughly to ensure no soap residue remains. Consider setting a specific time each day to make it a habit. Think of it as your pet’s daily spa treatment; they’ll appreciate it, and you'll love the peace of mind knowing their eating area is pristine.
Occasionally deep cleaning your pet's bowls is essential to remove stubborn stains and odors. You might want to do this once a week or every two weeks, depending on how messy your pet tends to be. One effective method is to soak the bowls in a mixture of warm water and white vinegar for about 30 minutes. This will help lift any tough stains and neutralize odors. After soaking, scrub with a soft sponge and rinse thoroughly. For those ceramic bowls, a gentle scrub with baking soda can work wonders too! Just remember, deep cleaning is like a reset button for your pet’s dining experience!
Some stains can be particularly tough to remove. If you find yourself facing stubborn marks, don’t fret! There are practical solutions and techniques for effectively tackling these issues. For example, you can create a paste using baking soda and water, apply it to the stained area, and let it sit for about 15 minutes before scrubbing. Alternatively, a mixture of hydrogen peroxide and water can be effective for tougher stains. Just be sure to rinse thoroughly afterward to keep your pet safe!
The material of your pet's bowls can affect how easily they can be cleaned. Stainless steel, ceramic, and plastic each come with their own pros and cons. Stainless steel is durable and dishwasher-safe, making it easy to clean, while ceramic bowls are often more aesthetically pleasing but can chip easily. Plastic bowls are lightweight and affordable but can harbor bacteria over time. When choosing a bowl, consider your pet’s habits and your cleaning preferences. Remember, the right bowl can make all the difference!
Preventing bacteria growth in your pet's bowls is essential for their health. To minimize the risk of contamination, make it a habit to clean the bowls daily and avoid leaving food in them for extended periods. Additionally, ensure that the bowls are placed in a clean area, away from dirt and debris. A good practice is to wash the area where the bowls sit regularly too. Think of it as creating a little oasis for your pet—a safe haven where they can enjoy their meals without worry!
Recognizing when your pet's bowls require cleaning is crucial for their well-being. Some key indicators that signal it’s time for a thorough wash include:
- Visible food residue or stains on the bowl.
- Unpleasant odors emanating from the bowl.
- Your pet showing reluctance to eat or drink.
- Visible mold or slime buildup, particularly in water bowls.
By staying vigilant and attentive to these signs, you can ensure that your pet’s feeding area remains clean and inviting.
Q: How often should I clean my pet's bowls?
A: It's best to rinse and wash your pet's bowls daily. Deep cleaning can be done weekly or bi-weekly depending on usage.
Q: Can I use regular dish soap to clean pet bowls?
A: Yes, but ensure it is a pet-safe detergent that is free from harmful chemicals.
Q: What is the best material for pet bowls?
A: Stainless steel is often considered the best option due to its durability and ease of cleaning, but ceramic is also a good choice if handled carefully.
Q: How can I remove tough stains from pet bowls?
A: A paste of baking soda and water or a mixture of hydrogen peroxide and water can help lift stubborn stains.
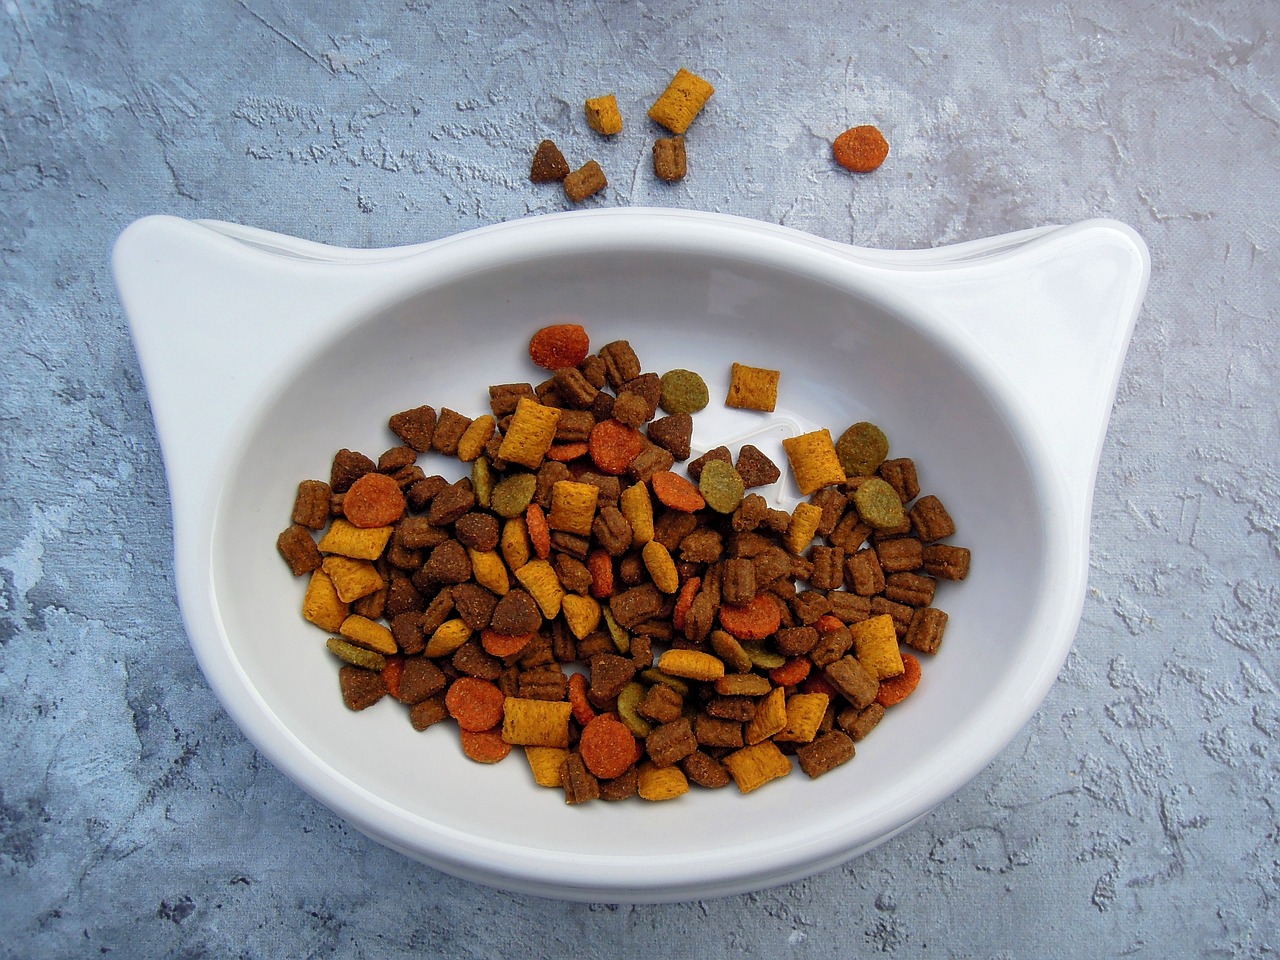
Understanding the Importance of Clean Bowls
When it comes to our furry friends, we often think of their cuddly nature, playful antics, and the joy they bring into our lives. However, one crucial aspect that sometimes slips our minds is the cleanliness of their feeding bowls. Regularly cleaning your pet's bowls is not just a chore; it’s a vital part of ensuring their health and happiness. Imagine eating off a plate that hasn't been washed in days—yuck, right? Well, our pets feel the same way when they drink from dirty bowls.
Dirty bowls can become a breeding ground for harmful bacteria, which can lead to a variety of health issues for your pet. From gastrointestinal problems to more severe infections, the risks are real. In fact, studies have shown that pet bowls can harbor more bacteria than a toilet seat! This is why maintaining a clean feeding environment should be a top priority for every pet owner.
Furthermore, pets are creatures of habit. If they encounter unpleasant smells or tastes in their food or water, they may refuse to eat or drink altogether. This can lead to dehydration or malnutrition, which can have serious consequences for their health. So, keeping those bowls sparkling clean is not just about aesthetics; it’s about ensuring your pet thrives.
To give you a clearer picture, let's break down the potential consequences of neglecting bowl cleanliness:
| Consequence | Description |
|---|---|
| Bacterial Growth | Dirty bowls can promote the growth of harmful bacteria, leading to infections. |
| Health Issues | Pets can suffer from gastrointestinal problems, vomiting, and diarrhea due to contaminated food and water. |
| Refusal to Eat | Unpleasant odors or tastes can cause pets to avoid their food or water, risking dehydration. |
In summary, maintaining clean bowls is essential for your pet's overall well-being. It’s a simple task that can have a profound impact on their health. Remember, a little effort goes a long way in keeping your furry companion happy and healthy!
Choosing the Right Cleaning Supplies
When it comes to keeping your pet's food and water bowls sparkling clean, choosing the right cleaning supplies is absolutely essential. You wouldn’t want to use harsh chemicals that could harm your furry friend, right? So, let’s dive into the world of cleaning supplies that are both effective and pet-safe. It’s like finding the perfect recipe for a delicious dish; you need the right ingredients to make it work!
First off, look for pet-safe detergents. These are specially formulated to eliminate germs and bacteria without leaving behind harmful residues. Brands that carry the label "non-toxic" or "safe for pets" are usually your best bet. It’s like ensuring the snacks you give your pet are healthy; you want to avoid anything that could upset their stomach or cause allergic reactions.
Next, consider the cleaning tools you’ll use. Microfiber cloths are fantastic for wiping down surfaces because they capture dirt and bacteria without scratching the bowls. You might also want to invest in a good-quality sponge or scrubber. Just be sure it’s dedicated solely to cleaning pet bowls—think of it as your pet’s personal cleaning assistant, always ready for action!
For those who prefer a more natural approach, you can whip up a DIY cleaning solution using common household items. A mixture of vinegar and water works wonders! Just combine equal parts of each in a spray bottle, and you’ve got yourself a powerful cleaner that’s safe for your pet. Not only does it help in cutting through grime, but it also neutralizes odors, making your pet’s dining area smell fresh. Remember, it’s like giving your pet a refreshing bath—clean, safe, and oh-so-important!
Here’s a quick table summarizing some common cleaning supplies and their benefits:
| Cleaning Supply | Benefits |
|---|---|
| Pet-safe detergent | Eliminates germs without harmful residues |
| Microfiber cloth | Captures dirt and bacteria effectively |
| Vinegar and water solution | Natural cleaner that neutralizes odors |
| Baking soda | Great for scrubbing tough stains |
Finally, don't forget about the importance of regular replenishment of your cleaning supplies. Just like you wouldn’t let your pet run low on food, keep an eye on your cleaning arsenal. Having everything on hand ensures that you can tackle those pesky cleaning tasks without delay. After all, a clean bowl is a happy bowl, and a happy bowl means a happy pet!
Daily Cleaning Routine
Establishing a daily cleaning routine for your pet's food and water bowls is essential for maintaining hygiene and ensuring that your furry friend stays healthy and happy. Just like we wouldn’t want to eat off a dirty plate, our pets deserve the same level of care and cleanliness. Think of their bowls as their dining area; a clean space not only promotes better health but also enhances their eating experience. So, how can you incorporate this routine into your daily life without it feeling like a chore?
First, make it a habit to check your pet's bowls every day. After your pet has eaten or drunk, take a moment to inspect the bowls for leftover food particles or stains. If you notice any residue, it’s time to give them a quick rinse. A simple rinse with warm water can make a world of difference. You might think, "But that's so easy!" and you're right! It truly can be that simple. Just like brushing your teeth, a quick rinse can prevent buildup and keep things fresh.
Next, consider setting a specific time each day for a more thorough clean. This could be right after breakfast or dinner, making it part of your pet's feeding routine. Use a mild, pet-safe detergent to wash the bowls thoroughly. Remember, the goal is to eliminate any bacteria that might be lurking. You can use a soft sponge or cloth to scrub the bowls, ensuring that you reach all the nooks and crannies. If you’re feeling adventurous, you might even want to sing a little tune while you scrub—after all, a little joy can make even the most mundane tasks feel fun!
Here’s a quick overview of a daily cleaning routine:
- After each meal: Rinse the bowls with warm water to remove food particles.
- Daily wash: Use a mild detergent and scrub the bowls thoroughly.
- Drying: Allow the bowls to air dry completely before refilling them.
In addition, don’t forget to regularly check the water bowl for cleanliness. Pets can be just as picky about their water as they are about their food. If the water looks cloudy or has floating debris, it’s time for a change! Refill it with fresh, clean water daily. If you want to take it a step further, you can even consider using a pet water fountain. These fountains keep water circulating, reducing the chances of bacteria growth and keeping your pet hydrated with fresh water at all times.
By making this daily cleaning routine a habit, you’re not only ensuring that your pet has a clean environment to eat and drink but also fostering a bond of care and responsibility. Remember, a clean bowl is a happy bowl, and a happy bowl leads to a happy pet!
Q: How often should I clean my pet's bowls?
A: Ideally, you should rinse your pet's bowls after each meal and give them a thorough wash at least once a day.
Q: Can I use regular dish soap to clean my pet's bowls?
A: Yes, but ensure it is pet-safe and rinse thoroughly to remove any soap residue.
Q: What if my pet’s bowls have stubborn stains?
A: For stubborn stains, consider using a mixture of baking soda and water to scrub the affected areas.
Q: Is it necessary to dry the bowls after washing?
A: Yes, allowing the bowls to air dry can help prevent bacteria growth.
Deep Cleaning Techniques
Deep cleaning your pet's food and water bowls is not just a chore; it’s an essential practice for ensuring your furry friend’s health and happiness. While daily cleaning is crucial, there are times when you need to roll up your sleeves and give those bowls a thorough scrub. Think of it as giving your pet’s dining area a spa day! After all, a clean bowl is a happy bowl, and a happy bowl means a happy pet.
To start with, you’ll want to gather some deep cleaning supplies. You may already have some of these at home, but here’s a quick list of what you might need:
- Pet-safe dish soap
- White vinegar
- Baking soda
- Soft scrub brush or sponge
- Hot water
Now, let’s get into the nitty-gritty of deep cleaning. First, you should rinse the bowls with hot water to remove any leftover food particles. This step is like giving them a warm-up before the main event! Next, create a cleaning solution using equal parts of water and white vinegar. Not only does vinegar have natural antibacterial properties, but it also helps to eliminate odors. So, go ahead and soak the bowls in this mixture for about 15-20 minutes. This soaking time is crucial—it allows the vinegar to break down any stubborn grime.
After soaking, it’s time to scrub! Use a soft scrub brush or sponge to gently scrub the bowls. Pay special attention to the edges and the bottoms, as these areas often hide the most bacteria. If you encounter stubborn stains or odors, sprinkle some baking soda on the affected areas before scrubbing. Baking soda acts as a gentle abrasive, helping to lift those pesky stains without scratching the surface of the bowl.
Once you’ve scrubbed the bowls thoroughly, rinse them well under hot running water to ensure all soap and cleaning agents are washed away. This step is vital; you don’t want your pet ingesting any leftover cleaning products! Additionally, you can place the bowls in the dishwasher if they are dishwasher-safe. A cycle on the top rack can provide an extra level of sanitation.
After rinsing, dry the bowls completely with a clean towel or let them air dry. Moisture can promote the growth of bacteria, so ensuring they are completely dry is essential. While drying, take a moment to inspect the bowls for any signs of wear and tear. If you notice any scratches or cracks, it might be time to consider replacing them, as these imperfections can harbor bacteria.
Lastly, remember that deep cleaning should be done at least once a week, but you may want to increase the frequency based on your pet's eating habits and how messy they can be. Keeping a clean feeding environment not only benefits your pet's health but also makes feeding time a more pleasant experience for both of you!

Dealing with Stubborn Stains
We all know that our furry friends can be messy eaters, and sometimes their food and water bowls bear the brunt of this chaos. Stubborn stains can seem like a personal challenge, but fear not! With the right techniques and a little elbow grease, you can tackle those pesky marks and restore your pet's bowls to their former glory. First, it’s essential to understand what causes these stains. Food residue, bacteria, and minerals from water can all contribute to the unsightly buildup. So, how do we combat this? Let’s dive into some effective methods.
One of the best approaches to dealing with stubborn stains is to use a combination of natural ingredients that you probably already have at home. For instance, a paste made from baking soda and water can work wonders. Simply mix the two until you achieve a thick consistency, apply it to the stained areas, and let it sit for about 15-20 minutes. This allows the baking soda to penetrate the stain and lift it away. Afterward, scrub gently with a soft sponge and rinse thoroughly. You’ll be amazed at how effective this simple solution can be!
If baking soda isn't doing the trick, consider using vinegar. This natural disinfectant not only helps in cutting through grease but also neutralizes odors. Mix equal parts of vinegar and water in a spray bottle and apply it directly to the stained areas. Let it sit for a few minutes before scrubbing. The acetic acid in vinegar is a powerful stain remover that can help break down tough residues. Just remember to rinse well afterward, as the smell can be strong!
For those stains that seem to laugh in the face of baking soda and vinegar, you might want to bring in the big guns: hydrogen peroxide. This powerful oxidizer can be particularly effective for tough, set-in stains. However, use it cautiously, as it can bleach certain materials. Always test a small area first! Apply a small amount of hydrogen peroxide to the stained area and let it sit for about 10 minutes before scrubbing and rinsing.
Lastly, if you’re dealing with particularly stubborn stains that just won’t budge, consider investing in a pet-safe enzymatic cleaner. These specialized products are designed to break down organic stains, making them particularly effective against food and pet waste. Follow the instructions on the label for the best results, and you’ll find that these cleaners can save you time and effort in the long run.
In summary, dealing with stubborn stains doesn’t have to be a daunting task. With a few household ingredients and a bit of persistence, you can keep your pet's bowls looking clean and fresh. Remember, a clean bowl is not just about aesthetics; it’s about providing a healthy environment for your beloved pet. So roll up your sleeves, grab those cleaning supplies, and let’s conquer those stains together!
- How often should I clean my pet's bowls? It's best to clean them daily to prevent bacteria buildup.
- Can I use regular dish soap to clean my pet's bowls? Yes, but ensure it’s thoroughly rinsed off to avoid any residue.
- Are there specific materials that are easier to clean? Stainless steel and ceramic bowls are generally easier to clean than plastic.
- What if my pet refuses to eat from a newly cleaned bowl? Some pets may be sensitive to changes; try adding a little of their favorite food to entice them.
Choosing the Right Bowl Material
When it comes to your pet's food and water bowls, the material you choose can make a significant difference in terms of cleanliness, durability, and overall safety. It's not just about aesthetics; it’s about providing a healthy environment for your furry friend. So, what should you consider when selecting the right bowl material? Let’s dive into the pros and cons of the most common materials used for pet bowls.
Stainless Steel bowls are often regarded as the top choice for pet owners. Why? Because they are incredibly durable, resistant to rust, and easy to clean. Unlike plastic, stainless steel doesn't harbor bacteria or odors, making it a hygienic option. However, they can be a bit noisy when your pet is eating, which might be a concern for some. Additionally, if you have a pet that likes to chew, stainless steel won't break, but it can cause some noise that might startle your pet.
On the other hand, ceramic bowls can be visually appealing, often coming in vibrant colors and designs. They are heavy, which means they won’t easily tip over, and they are generally dishwasher safe. However, it's essential to ensure that the ceramic is lead-free and non-toxic. The downside? Ceramic can chip or crack, and if that happens, it can create a hiding spot for bacteria, compromising your pet's health.
Plastic bowls are lightweight and inexpensive, making them a popular choice among pet owners. They come in various colors and designs, which can be fun. However, plastic can scratch easily, creating grooves where bacteria can thrive. Moreover, some pets may develop an allergy to plastic, leading to skin irritations around their mouths. If you opt for plastic, look for high-quality, BPA-free options that are specifically designed for pet use.
Here’s a quick comparison table to summarize the key points:
| Material | Pros | Cons |
|---|---|---|
| Stainless Steel |
|
|
| Ceramic |
|
|
| Plastic |
|
|
Ultimately, the choice of bowl material comes down to your pet's specific needs and your lifestyle. It’s essential to weigh the pros and cons carefully. Remember, a clean bowl is a happy bowl, and the right material can make all the difference in maintaining that cleanliness!
Q: How often should I replace my pet's bowls?
A: It's a good idea to replace plastic bowls every few months if they show signs of wear. Stainless steel and ceramic bowls can last for years if properly maintained.
Q: Can I use human dishes for my pet?
A: While it's possible, it's best to use bowls specifically designed for pets to avoid any potential hazards.
Q: What should I do if my pet has a reaction to a bowl?
A: If you notice any signs of irritation, discontinue use immediately and consult your vet for alternatives.
Preventing Bacteria Growth
When it comes to your furry friend's health, in their food and water bowls is paramount. Just like we wouldn’t want to eat from a dirty plate, our pets deserve a clean and safe feeding environment. Bacteria can thrive in the moist, often leftover food residue found in these bowls, leading to potential health issues for your beloved pet. So, how do we keep those bowls sparkling clean and free from harmful germs? Let’s dive into some effective strategies!
First and foremost, establishing a routine is key. Daily cleaning is essential, but it’s not just about rinsing the bowls with water. You should use pet-safe detergents that are effective against bacteria yet gentle enough for your pet. Look for products labeled as non-toxic and free from harsh chemicals. This way, you ensure that your cleaning process doesn’t introduce any harmful substances into your pet's eating area.
Another important aspect is the drying process. After washing the bowls, make sure to dry them thoroughly. Moist environments are a breeding ground for bacteria, so letting the bowls air dry or using a clean towel can help minimize moisture. You may be surprised to learn that a quick wipe with a paper towel after drying can also help eliminate any remaining germs.
Additionally, consider the placement of your pet’s bowls. Keeping them in a clean, dry area can make a significant difference. If the bowls are placed on a surface that collects dust or moisture, like a damp basement floor, it may encourage bacteria growth. Instead, opt for an easily cleanable surface, and regularly wipe down the area around the bowls.
Here’s a quick table summarizing some effective practices to prevent bacteria growth:
| Practice | Description |
|---|---|
| Daily Cleaning | Wash bowls with pet-safe detergent and rinse thoroughly. |
| Proper Drying | Ensure bowls are completely dry before refilling. |
| Strategic Placement | Keep bowls in a clean, dry area away from contaminants. |
Moreover, don’t forget to inspect your pet’s bowls regularly for any signs of wear and tear. Scratches and cracks can harbor bacteria, making it difficult to clean adequately. If you notice any damage, it might be time to invest in new bowls. It’s a small price to pay for your pet’s health!
Lastly, always remember to keep an eye on your pet’s eating habits. If they seem disinterested in their food or water, it could be a sign that the bowls need a thorough cleaning. Pets can be quite sensitive to their surroundings, and a dirty bowl can deter them from eating or drinking properly.
By following these simple yet effective tips, you can create a safe and healthy feeding environment for your furry friends. Keeping their bowls clean not only helps prevent bacteria growth but also contributes to their overall well-being. So, roll up your sleeves and get ready to ensure your pet’s feeding area is as clean as can be!
Q: How often should I clean my pet’s bowls?
A: Ideally, you should clean your pet's bowls daily to prevent bacteria buildup.
Q: Can I use regular dish soap to clean my pet’s bowls?
A: It’s best to use pet-safe detergents that are non-toxic and free from harsh chemicals.
Q: What should I do if my pet refuses to eat from a bowl?
A: If your pet seems disinterested, check for cleanliness and any signs of damage to the bowl.
Signs Your Bowls Need Cleaning
Keeping an eye on your pet's bowls is more important than you might think. After all, a clean bowl is not just about aesthetics; it’s about the health and happiness of your furry friend. So, how can you tell when it's time to roll up your sleeves and give those bowls a good scrub? Here are some key indicators to watch for.
First off, if you notice any visible residue or food particles lingering in the bowls, it's a clear sign that they need cleaning. Even if the bowl looks somewhat clean, leftover food can attract bacteria, which can cause gastrointestinal issues for your pet. Imagine leaving a half-eaten sandwich out on the counter – it won't take long for mold or other nasties to show up, right? Your pet's bowls are no different!
Another sign to look out for is foul odors. If the water bowl smells like something you’d rather not identify, it’s definitely time to clean it. Stagnant water can become a breeding ground for bacteria and algae, which can lead to serious health problems for your pet. If you can’t stand the smell, your pet probably won’t want to drink from it either!
Also, consider the frequency of use. If your pet is a heavy eater or drinker, you might need to clean the bowls more often. Pets can be messy, and food and water can splash around, creating a perfect environment for bacteria to thrive. A good rule of thumb is to give the bowls a quick rinse after each meal, and a thorough wash at least once a week.
Finally, keep an eye on your pet's behavior. If they suddenly become disinterested in their food or water, it could be a sign that something is off with their bowls. Just like humans, pets can be picky about cleanliness. If their usual enthusiasm for mealtime starts to wane, check those bowls!
In summary, the signs that your pet's bowls need cleaning include:
- Visible residue or food particles
- Foul odors emanating from the bowls
- High frequency of use without regular cleaning
- Changes in your pet’s eating or drinking habits
By staying vigilant and recognizing these signs, you can ensure that your pet’s feeding environment remains healthy and inviting. Remember, a clean bowl is a happy bowl, and a happy bowl means a happy pet!
1. How often should I clean my pet's food and water bowls?
It's best to wash your pet's bowls daily. A quick rinse after each meal can help keep them clean, while a thorough wash at least once a week is recommended to prevent bacteria buildup.
2. What cleaning supplies are safe for pet bowls?
Opt for pet-safe detergents that are free from harsh chemicals. You can also use a mixture of vinegar and water for a natural cleaning solution that disinfects without harmful residues.
3. Can I use a dishwasher to clean my pet's bowls?
Yes, many pet bowls, especially those made of stainless steel or ceramic, are dishwasher-safe. Always check the manufacturer's instructions before placing them in the dishwasher.
4. How can I remove stubborn stains from my pet's bowls?
For tough stains, try soaking the bowls in a mixture of baking soda and vinegar. Let it sit for a while, then scrub with a soft brush. This method can effectively lift stains and odors.
5. Are there specific materials I should avoid for pet bowls?
Plastic bowls can harbor bacteria and scratches over time, which can be harmful. Opt for stainless steel or ceramic bowls, which are easier to clean and more hygienic.
Frequently Asked Questions
- How often should I clean my pet’s food and water bowls?
It's best to clean your pet's bowls daily. This helps prevent bacteria growth and keeps your furry friend healthy. Just think of it like washing your own dishes; you wouldn't want to eat off a dirty plate, right?
- What cleaning supplies are safe for my pet’s bowls?
Look for pet-safe detergents that are free from harsh chemicals. Mild soap and warm water usually do the trick. Always rinse thoroughly to ensure no residue is left behind, just like you would with your own dishes!
- Can I use bleach to clean my pet’s bowls?
It's not recommended to use bleach, as it can leave harmful residues. Stick to pet-safe cleaners that are effective yet gentle. Remember, you want a clean bowl, not a toxic one!
- What should I do for stubborn stains?
For tough stains, try soaking the bowls in a mixture of vinegar and water or baking soda paste. These natural cleaners can work wonders without harming your pet. It’s like giving those stains a spa day!
- Are certain bowl materials easier to clean than others?
Absolutely! Stainless steel and ceramic bowls are generally easier to clean than plastic ones. They don’t hold onto stains or odors as much. Think of them as the superheroes of pet bowls!
- How can I tell if my pet’s bowls need cleaning?
If you notice any food residue, discoloration, or a funky smell, it's time for a wash. Trust your senses; if it looks or smells off, it probably is!
- What are the signs of bacteria growth in pet bowls?
Signs include slimy residue, discoloration, or a foul odor. If you see or smell something unpleasant, it’s a clear indication that your pet's bowls need a thorough cleaning.
- Is it necessary to deep clean my pet's bowls?
Yes, deep cleaning is essential at least once a week. This ensures that any stubborn bacteria or stains are completely eliminated, giving your pet a safe and healthy eating environment.


