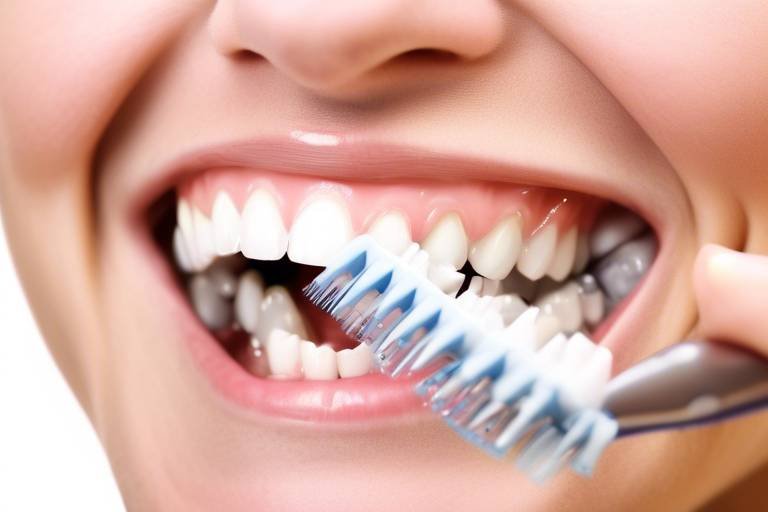
How to Properly Clean and Store Grooming Tools
Welcome to the ultimate guide on how to properly clean and store grooming tools! If you're a pet owner or a professional groomer, you know how essential it is to maintain your grooming tools in top-notch condition. Not only does this ensure the longevity of your tools, but it also guarantees a hygienic grooming experience for your furry friends. Think of your grooming tools as an extension of your care for your pet—just like you wouldn't want to use a dirty brush on your hair, your pets deserve the same level of cleanliness. So, let’s dive into the best practices for keeping those tools sparkling and ready for action!
Regular cleaning of grooming tools is not just a chore; it's a necessity! When you groom your pet, you're not only beautifying them but also ensuring their health. Over time, grooming tools can accumulate dirt, oils, and bacteria, which can lead to skin irritations or infections. Imagine using a brush caked with old hair and grime—yikes! By understanding the significance of cleanliness, you can help maintain the health of both your tools and your pets. Plus, a clean tool is a happy tool, and it makes your grooming sessions much more enjoyable!
Cleaning grooming tools might seem daunting, but with a systematic approach, it can be a breeze! Here’s a step-by-step process to ensure every tool is thoroughly cleaned:
- Disassemble: Take apart your tools as needed to reach all surfaces.
- Wash: Use warm, soapy water to remove debris and hair.
- Sanitize: Apply a disinfectant to kill any lingering bacteria.
By following these steps, you’ll keep your grooming tools in pristine condition, ready for the next grooming adventure!
Disassembling grooming tools is crucial for effective cleaning. Think of it like taking apart a puzzle—each piece needs to be cleaned individually to ensure a thorough job. For instance, clippers often have blades that can be removed, allowing you to clean both the blades and the body of the clipper itself. Always refer to the manufacturer's instructions for disassembly to avoid any damage. Remember, the more you can clean, the better your tools will perform!
Brushes and combs require specific cleaning methods to remove hair and debris effectively. Start by using a comb or a specialized tool to remove hair from the bristles. Then, wash them in warm, soapy water, making sure to scrub gently to avoid damaging the structure. Rinse thoroughly and allow them to air dry. If they’re particularly dirty, consider soaking them in a disinfectant solution for a few minutes before rinsing. A clean brush makes for a happy pet, and it also helps reduce matting and tangles!
Proper sanitization of clippers and blades is essential for preventing infections. After each use, it’s crucial to wipe down the blades with a disinfectant solution. You can also use a spray specifically designed for clipper blades. This not only kills bacteria but also helps maintain the sharpness of the blades. Make it a habit to perform this step after every grooming session, just like you would wash your hands after cooking. A little effort goes a long way in keeping your tools safe and effective!
After cleaning, drying and storing grooming tools properly is vital to prevent rust and damage. You should always air dry your tools completely before storing them. Avoid using heat sources, as they can warp plastic components. For storage, consider a cool, dry place to keep your tools safe from moisture. Using tool cases or racks can help keep them organized and easily accessible. Just like a well-organized toolbox makes a mechanic's job easier, an organized grooming station enhances your efficiency!
Selecting appropriate storage solutions can prolong the life of grooming tools. Think of storage as a protective cocoon for your tools. You can use:
- Tool cases that provide cushioning and protection.
- Racks that keep tools visible and accessible.
- Drawers that can be labeled for easy identification.
By choosing the right storage options, you ensure that your grooming tools are not only protected but also ready for action whenever you need them!
Organizing grooming tools not only saves time but also enhances efficiency during grooming sessions. Imagine trying to find a specific comb in a jumbled mess of tools—frustrating, right? By maintaining an organized grooming space, you can easily grab what you need, allowing you to focus on what really matters: your pet! An organized space can also reduce stress and make the grooming experience more enjoyable for both you and your furry friend.
Keeping an inventory of grooming tools helps track their condition and usage. This is like having a personal checklist for your grooming arsenal! Knowing what tools are available and when they need replacement or repair can save you from last-minute scrambles. Consider creating a simple spreadsheet or list to log your tools, their condition, and when they were last cleaned. This proactive approach ensures you’re always prepared and that your grooming sessions go smoothly.
Q: How often should I clean my grooming tools?
A: Ideally, you should clean your tools after every use to maintain hygiene and performance.
Q: Can I use regular soap to clean my grooming tools?
A: Yes, regular soap works well, but ensure it’s gentle and doesn’t contain harsh chemicals that could damage your tools.
Q: What’s the best way to store my grooming tools?
A: Store them in a cool, dry place, preferably in a case or rack to keep them organized and protected from moisture.
Q: How do I know when to replace my grooming tools?
A: If you notice any rust, damage, or decreased performance, it’s time to consider replacing that tool.
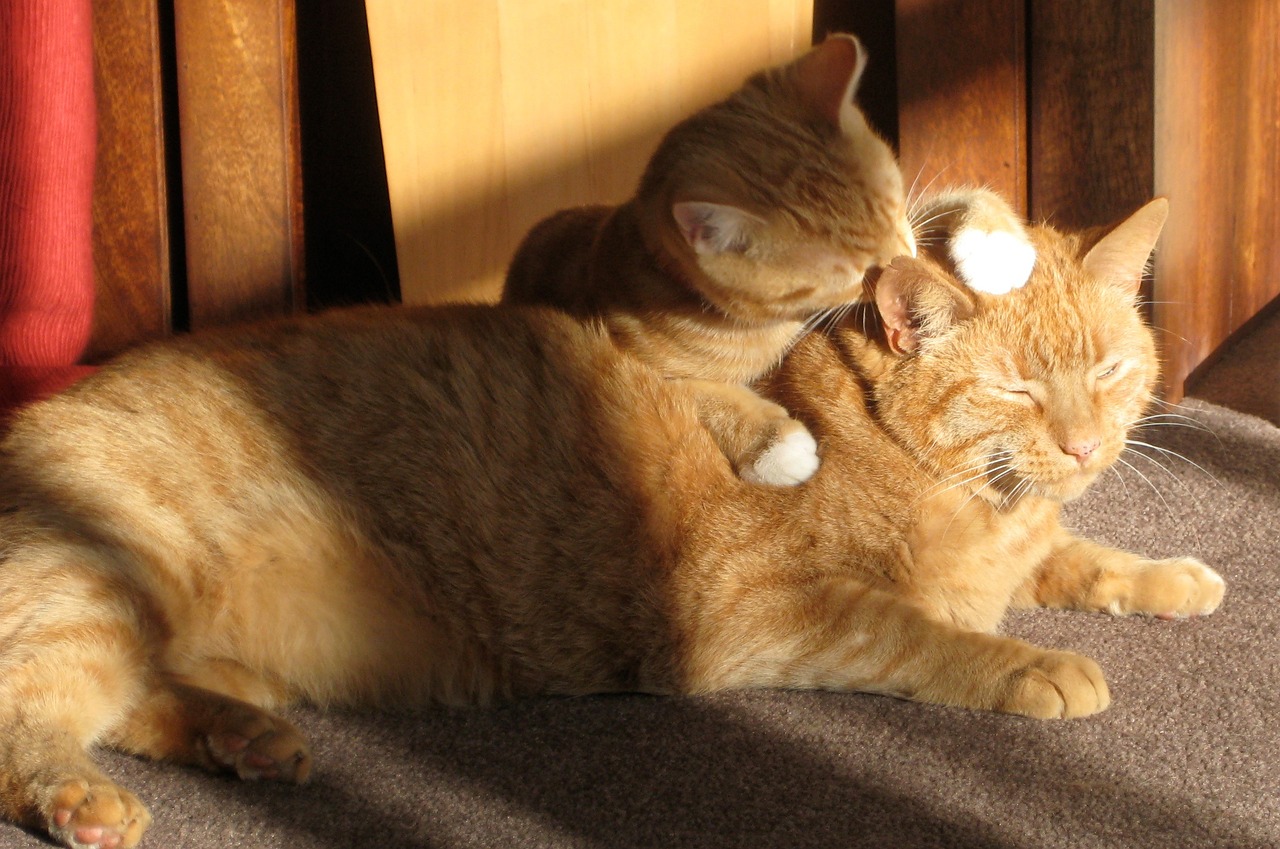
Importance of Cleaning Grooming Tools
Cleaning grooming tools is not just a chore; it's a vital practice that directly impacts the health and well-being of your pets. Imagine using a dirty brush on your beloved furry friend—yikes! Not only can it cause skin irritations, but it can also lead to infections. Regular cleaning prevents the buildup of bacteria and dirt, ensuring that each grooming session is as hygienic as possible. By maintaining cleanliness, you’re not just caring for your tools; you’re also caring for your pets.
Moreover, grooming tools are an investment. Whether it's a high-quality pair of clippers or an ergonomic brush, keeping them clean ensures they last longer. Think of it this way: would you drive a car without ever getting the oil changed? Of course not! Similarly, your grooming tools require regular maintenance to function optimally. A clean tool is a happy tool, and a happy tool makes for a happy grooming experience.
Here are some reasons why cleaning your grooming tools is essential:
- Prevention of Infections: Dirty tools can harbor harmful bacteria, leading to skin infections or diseases in pets.
- Enhanced Performance: Clean tools work better. Clogged clippers or matted brushes can hinder the grooming process, making it frustrating for both you and your pet.
- Longevity: Regular cleaning can extend the lifespan of your tools, saving you money in the long run.
- Improved Hygiene: A clean grooming environment is crucial for maintaining the overall health of your pets.
In summary, the importance of cleaning grooming tools cannot be overstated. Not only does it ensure a hygienic grooming experience, but it also helps maintain the tools themselves. By incorporating regular cleaning into your grooming routine, you're investing in the health of your pets and the longevity of your tools. So, the next time you finish grooming, take a moment to give those tools a good scrub—they'll thank you for it!

Step-by-Step Cleaning Process
Cleaning your grooming tools is not just a chore; it’s an essential part of maintaining their effectiveness and ensuring the health of your furry friends. Think of it as giving your tools a spa day! A systematic approach to cleaning can make the process more efficient and thorough. Here’s a step-by-step guide to help you through the cleaning process, ensuring that every nook and cranny of your grooming tools is attended to.
First things first, disassemble your grooming tools wherever possible. This is crucial because it allows you to reach all the hidden areas where dirt and grime can accumulate. For instance, if you have clippers, remove the blades and any detachable parts. This ensures that you can clean every surface effectively. It’s like peeling an onion; you need to get to the core to truly know what you’re dealing with!
Next, it’s time to wash your tools. Use warm, soapy water for this step. A gentle dish soap works wonders here. Avoid harsh chemicals that can damage the tools. Submerge the disassembled parts in the soapy water and let them soak for a few minutes. This helps to loosen any stubborn debris. While they soak, you can use a soft brush or cloth to scrub away any remaining dirt. Pay special attention to brushes and combs, as hair can get tangled in the bristles. You want these tools to be as fresh as a daisy!
Once you've scrubbed everything clean, it’s time for the sanitizing stage. This is where you can truly elevate your cleaning routine. Mix a solution of water and a pet-safe disinfectant, or use isopropyl alcohol. Dip a clean cloth into the solution and wipe down all surfaces of the tools, including the handles and any areas that come into contact with your pet. For clippers, be sure to follow the manufacturer’s instructions for sanitization, as some may require specific products or methods. This step is vital to prevent any potential infections during grooming sessions.
After sanitizing, rinse the tools under clean, running water to remove any soap or disinfectant residue. It’s important to ensure that no cleaning products are left behind, as they can irritate your pet’s skin during grooming. Drying your tools properly is the next step. Use a clean towel to pat them dry, and then let them air dry completely in a well-ventilated area. Never store your tools while they are still damp, as moisture can lead to rust and degradation of materials. Think of it as letting your tools breathe after a long day of hard work!
Finally, once your tools are completely dry, it’s time to store them properly. Make sure to keep them in a clean, dry place, away from direct sunlight and moisture. Using a dedicated grooming case or rack can help keep your tools organized and easily accessible. By following these steps, you’ll not only extend the lifespan of your grooming tools but also ensure that each grooming session is safe and hygienic for your beloved pets.
Disassembling Tools for Cleaning
When it comes to cleaning your grooming tools, disassembling them is a crucial first step. Think of it like taking apart a puzzle; only when you separate the pieces can you see the full picture and clean every nook and cranny. Many grooming tools, such as clippers, scissors, and brushes, are designed to be taken apart, allowing for a more thorough cleaning. But how do you go about it without damaging your precious tools? Here’s a simple guide to help you navigate the process.
First and foremost, always refer to the manufacturer's instructions for disassembly. Each tool may have its unique mechanism, and knowing how to properly take it apart will save you a lot of headaches. For instance, some clippers have removable blades that are easy to detach, while others might require a bit more finesse. Use the right tools, such as screwdrivers or pliers, to avoid stripping screws or damaging parts. If you’re unsure, a quick online tutorial can be a lifesaver.
Once you’ve successfully disassembled your grooming tools, it's time to take a closer look at each component. Pay special attention to areas where hair, dirt, and product residue tend to accumulate. For brushes and combs, removing the bristles or teeth can make it easier to clean out trapped hair. Similarly, with clippers, separating the blade from the body allows you to clean both parts effectively. Here’s a quick breakdown:
- Brushes: Remove the bristles if possible, or use a comb to clear out hair.
- Clippers: Detach the blade and clean both the blade and the clipper body separately.
- Scissors: Open the blades fully to clean between them, ensuring no hair or debris is trapped.
After disassembling, it's essential to clean each part thoroughly. Use warm, soapy water and a soft cloth or sponge to wipe down all surfaces. For more stubborn grime, a soft-bristled brush can help dislodge dirt without scratching surfaces. Once everything is cleaned, you’ll want to ensure that all parts are completely dry before reassembling. This step is vital to prevent rust and prolong the lifespan of your tools.
In summary, taking the time to properly disassemble your grooming tools not only ensures a deeper clean but also helps maintain their functionality. Treat your tools with care, and they’ll reward you with longevity and performance. Remember, a clean tool is a happy tool, and in turn, a happy tool leads to a happy grooming experience!
Cleaning Brushes and Combs
When it comes to grooming, brushes and combs are your best friends. However, they can also become a breeding ground for dirt, hair, and bacteria if not cleaned properly. Imagine trying to brush your pet with a dirty tool—yikes! Not only does it compromise hygiene, but it can also irritate your pet's skin. So, let's dive into the best practices for keeping these essential grooming tools spick and span.
First things first, before you start cleaning, gather all your supplies. You'll need a pair of scissors, warm soapy water, a toothbrush or small brush, and a disinfectant. Once you have everything ready, it’s time to tackle the mess. Begin by removing any hair from the brush or comb using your fingers or scissors. This step is crucial because it allows the soap and water to reach the bristles and teeth effectively.
Next, fill a basin or sink with warm water and add a few drops of mild dish soap. Submerge your brushes and combs in the soapy water, allowing them to soak for about 10-15 minutes. This soaking process helps loosen any stubborn debris. After soaking, take your toothbrush or small brush and gently scrub the bristles or teeth, paying special attention to any areas that look particularly grimy. Rinse thoroughly under running water to remove all soap and residue. It’s important to ensure that no soap is left behind, as it can cause irritation to your pet’s skin during the next grooming session.
For an extra layer of cleanliness, consider sanitizing your brushes and combs after washing. You can achieve this by spraying them with a pet-safe disinfectant or soaking them in a solution of one part vinegar to three parts water for about 10 minutes. This not only kills bacteria but also helps eliminate any lingering odors. After sanitizing, rinse them again and shake off any excess water.
Finally, drying your brushes and combs is just as important as cleaning them. Place them on a clean towel or drying rack to air dry completely. Avoid using heat sources like hairdryers, as they can damage the bristles or teeth. Proper drying prevents rust and ensures that your grooming tools remain in excellent condition for years to come. Remember, a clean brush or comb not only enhances your pet's grooming experience but also promotes a healthier coat!
- How often should I clean my grooming tools? It's best to clean your brushes and combs after every use, especially if they have come into contact with dirt or oils.
- Can I use regular household cleaners on grooming tools? No, it's important to use pet-safe cleaners to avoid any harmful reactions on your pet's skin.
- What should I do if my brushes or combs are damaged? If you notice any broken bristles or teeth, it might be time to replace them to ensure effective grooming.
Sanitizing Clippers and Blades
When it comes to grooming, is not just a good practice; it's essential for ensuring the health and safety of your pets. Clippers and blades come into direct contact with your pet's skin and fur, making them prime candidates for harboring bacteria and other pathogens. Neglecting to sanitize these tools can lead to infections and other health issues, so let's dive into the best practices for keeping your clippers and blades clean and safe.
First and foremost, after each grooming session, it’s crucial to remove any hair and debris from the clippers and blades. You can do this by using a small brush specifically designed for cleaning these tools. Gently brush away any hair, making sure to reach all the nooks and crannies. Think of it like cleaning your teeth; if you miss a spot, bacteria can thrive there, leading to problems down the road.
Once you've removed the hair, the next step is to disinfect. You can use a variety of disinfectants, but it’s best to opt for those specifically formulated for grooming tools. Look for products that are effective against a broad spectrum of bacteria and viruses. To apply the disinfectant:
- Spray or wipe the disinfectant onto the blades and the clipper body.
- Allow it to sit for the recommended time, usually around 10 minutes, to ensure maximum efficacy.
- Wipe off any excess with a clean, dry cloth.
Another important aspect of sanitizing is to oil the blades after cleaning. This not only keeps the blades lubricated for smooth operation but also creates a barrier that can help prevent rust and corrosion. A good quality clipper oil is essential here. Just a few drops on the blades will do the trick. Remember, a well-oiled blade is a happy blade!
For deeper sanitation, consider using a sterilizing machine or an ultrasonic cleaner. These devices can effectively eliminate germs and bacteria that are not easily reached by manual cleaning methods. If you're running a grooming business or frequently groom your pets, investing in such equipment can be a game changer.
Lastly, always ensure that your clippers and blades are stored in a clean, dry place. Moisture can lead to rust, and a dirty environment can reintroduce bacteria to your freshly sanitized tools. Store them in a protective case or on a clean shelf, away from dust and moisture.
Q: How often should I sanitize my clippers and blades?
A: It's recommended to sanitize your clippers and blades after each use to prevent the buildup of bacteria and ensure a safe grooming experience.
Q: Can I use regular household disinfectants on my grooming tools?
A: While some household disinfectants may be effective, it's best to use products specifically designed for grooming tools to ensure they are safe and effective.
Q: What should I do if my blades are rusty?
A: If your blades have developed rust, it's best to replace them. Using rusty blades can cause skin irritation and infections in pets.
Q: Is it necessary to oil the blades after sanitizing?
A: Yes, oiling the blades after cleaning is important as it helps maintain their performance and longevity while preventing rust.
Drying and Storing Tools
After you’ve meticulously cleaned your grooming tools, the next critical step is drying and storing them properly. Just like a well-cooked meal needs the right plating to shine, your grooming tools deserve the same attention to detail. Proper drying prevents rust and damage, while effective storage keeps them organized and ready for the next grooming session.
First off, let’s talk about drying. It’s essential to ensure that your tools are completely dry before putting them away. Leaving moisture on tools can lead to rust and deterioration. Here are some tips to ensure your tools dry effectively:
- Air Drying: Place your tools on a clean, dry towel or a drying rack. Ensure they are spread out so air can circulate around them.
- Avoid Heat: While it might be tempting to use a hairdryer or place them near a heater, excessive heat can warp or damage the tools. Stick to natural air drying whenever possible.
- Use a Soft Cloth: For metal tools, gently wipe them down with a soft, lint-free cloth to remove any remaining moisture.
Once your tools are dry, it’s time to think about storage. Proper storage is not just about keeping your tools safe; it’s about making your grooming routine more efficient. Consider the following storage solutions:
- Tool Cases: Invest in a sturdy case with compartments to keep your tools separated and protected. This prevents them from knocking against each other and causing damage.
- Wall Racks: If you’re short on space, wall racks can be a fantastic way to keep your tools organized and within reach. Plus, it adds a nice aesthetic to your grooming area!
- Drawer Organizers: For those who prefer a more traditional approach, drawer organizers can help keep your tools sorted and easy to find.
Now, let’s not forget about the environment in which you store your grooming tools. Ideally, they should be kept in a cool, dry place, away from direct sunlight. Exposure to heat and humidity can lead to rusting and degradation of materials over time. If you have a dedicated grooming station, make sure it’s well-ventilated and free from excess moisture.
To sum it up, drying and storing your grooming tools properly is just as important as cleaning them. By taking these extra steps, you not only prolong the life of your tools but also ensure that they remain in top-notch condition for your next grooming session. Remember, a well-cared-for tool is a reliable tool!
Q: How often should I clean my grooming tools?
A: Ideally, you should clean your grooming tools after every use to prevent the buildup of bacteria and debris.
Q: Can I use soap and water for cleaning?
A: Yes, using mild soap and warm water is effective. Just ensure you rinse and dry them thoroughly afterward.
Q: What should I do if my clippers are rusty?
A: If your clippers have developed rust, you can try using a rust remover or fine sandpaper to gently scrub it off. However, if the rust is extensive, it may be time to replace the clippers.
Q: Is it necessary to sanitize my tools?
A: Yes, sanitizing your tools after cleaning is crucial to prevent infections, especially if they are used on pets.
Choosing the Right Storage Solutions
When it comes to keeping your grooming tools in tip-top shape, choosing the right storage solutions is absolutely vital. Think of your tools as your trusty sidekicks in the grooming game; if they’re not well taken care of, they can become less effective or even damaged. So, what are the best ways to store your grooming tools? Well, it all starts with understanding the options available to you. There are various storage solutions that cater to different needs and preferences, ensuring your tools are not just stored, but stored in a way that enhances their longevity and accessibility.
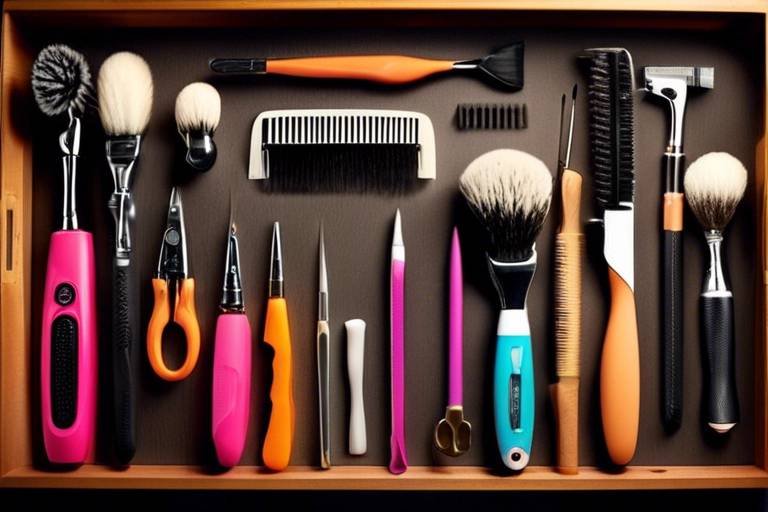
One popular option is a grooming tool case. These cases often come with compartments and padding to keep your tools secure and organized. Imagine a toolbox, but for your grooming gear! They’re perfect for mobile groomers or anyone who likes to keep their tools in one place. Another option is wall-mounted racks. These racks not only save space but also allow you to display your tools, making them easy to grab when you need them. Plus, it keeps them off surfaces where they might get dirty or misplaced.
For those who have a dedicated grooming station, drawers can be an excellent choice. You can categorize your tools by type, size, or frequency of use, making it a breeze to find what you need. Consider using clear containers or dividers within drawers to separate different types of tools. This way, you can quickly locate your scissors, clippers, brushes, and combs without rummaging through a jumble of equipment. Remember, a clean and organized space not only boosts your efficiency but also enhances your overall grooming experience.
Now, while selecting storage solutions, it’s essential to keep in mind the environment where you’ll be storing your tools. Avoid damp areas that can lead to rusting, especially for metal tools. Instead, opt for a dry, cool place that allows air circulation. If you’re using plastic storage, make sure it’s durable and won’t warp over time. You want your tools to be as ready for action as you are!
In summary, the right storage solutions can make a world of difference in maintaining the quality and longevity of your grooming tools. By investing in suitable cases, racks, or drawer systems, you’ll not only protect your investment but also streamline your grooming process. After all, a well-organized grooming station is like having a perfectly tuned engine; it runs smoothly and efficiently, allowing you to focus on what truly matters—keeping your pets looking their best!
- What is the best way to clean grooming tools? Regularly clean your tools with warm soapy water, rinse thoroughly, and sanitize them to prevent bacteria buildup.
- How often should I clean my grooming tools? It’s best to clean your tools after each grooming session to ensure hygiene and effectiveness.
- Can I store my grooming tools in a damp area? No, storing tools in damp areas can lead to rust and damage. Always choose a dry location.
- What types of storage solutions are recommended? Grooming tool cases, wall-mounted racks, and organized drawers are excellent options.
Benefits of Tool Organization
When it comes to grooming tools, organization is not just a matter of aesthetics; it plays a pivotal role in enhancing your overall grooming experience. Imagine walking into your grooming space and immediately being able to find everything you need without rummaging through a chaotic pile of tools. This not only saves you precious time but also reduces stress, making the grooming process smoother and more enjoyable for both you and your pet.
One of the most significant benefits of keeping your grooming tools organized is the increase in efficiency. When your tools are neatly arranged, you can easily access them, which allows you to maintain a steady workflow. For instance, if you have a designated spot for each tool, you won’t waste time looking for that elusive pair of scissors or the right brush. This streamlined approach means you can focus on what truly matters—providing the best grooming experience for your furry friend.
Moreover, organization can significantly prolong the lifespan of your grooming tools. When tools are stored haphazardly, they’re more prone to damage. For example, if clippers are thrown into a drawer without any protection, they could get scratched or the blades could become dull. By using appropriate storage solutions, such as cases or racks, you can keep your tools safe from wear and tear. This not only saves you money in the long run but also ensures that your tools perform optimally every time you use them.
Another key advantage is that an organized space promotes hygiene. When tools are neatly stored, it’s easier to keep track of their cleanliness. You can quickly identify which tools need cleaning, preventing the buildup of bacteria and ensuring a healthy grooming environment. Plus, when everything has its place, you’re less likely to accidentally mix dirty tools with clean ones, which is crucial for maintaining hygiene standards.
In addition, organizing your grooming tools can lead to a more creative and enjoyable grooming process. When you have everything at your fingertips, you might find yourself experimenting with new styles or techniques that you hadn’t considered before. The freedom to explore can make grooming a fun and fulfilling activity rather than a chore.
To sum it up, the benefits of tool organization are manifold. Here’s a quick recap:
- Increased Efficiency: Easily access tools to save time.
- Prolonged Lifespan: Protect tools from damage through proper storage.
- Enhanced Hygiene: Keep track of cleanliness to maintain health standards.
- Creative Freedom: Explore new grooming techniques with ease.
Ultimately, investing time in organizing your grooming tools will pay off in spades. Not only will you enjoy a more efficient and effective grooming routine, but you’ll also create a space that inspires creativity and care for your beloved pets.
Q: How often should I clean my grooming tools?
A: It's best to clean your grooming tools after each use to prevent bacteria buildup and ensure they remain in good condition.
Q: What is the best way to store grooming tools?
A: Store grooming tools in a cool, dry place using cases or racks to keep them organized and protected from damage.
Q: Can I use regular soap to clean my grooming tools?
A: While regular soap can help remove dirt and debris, it's advisable to use a disinfectant solution specifically designed for grooming tools to ensure proper sanitization.
Q: How do I know when my grooming tools need to be replaced?
A: If you notice any rust, dull blades, or broken parts that cannot be repaired, it's time to replace your grooming tools to ensure safety and effectiveness.
Maintaining an Inventory
Maintaining an inventory of your grooming tools is not just a good idea; it’s essential for ensuring your tools are always in the best shape for use. Imagine trying to find a specific brush or clipper during a busy grooming session only to realize it’s missing or in poor condition. Frustrating, right? By keeping a detailed inventory, you can avoid such headaches and streamline your grooming process. It’s like having a personal assistant who knows exactly where everything is and what condition it’s in!
So, how do you go about creating and maintaining this inventory? First, start by listing all your grooming tools. This list should include everything from brushes and combs to clippers and scissors. You can use a simple spreadsheet or a specialized inventory app to keep track of your items. Here’s a basic template to get you started:
| Tool Name | Condition | Date of Last Use | Next Maintenance Date |
|---|---|---|---|
| Dog Grooming Brush | Good | 2023-10-01 | 2023-12-01 |
| Cat Clipper | Needs Repair | 2023-09-15 | 2023-10-15 |
In this table, you can easily see the condition of each tool at a glance. By regularly updating this inventory, you’ll have a clear understanding of when tools need maintenance, repair, or replacement. This proactive approach not only saves time but also helps you budget for new tools when necessary.
Additionally, consider categorizing your tools based on their usage frequency. For example, tools that you use daily should be easily accessible, while those used less frequently can be stored away. This organization will help you quickly find what you need without rummaging through clutter. Plus, it’s a great way to keep your workspace tidy and efficient!
Finally, don’t forget to incorporate a routine check-up for your inventory. Set a reminder every few months to review the condition of your tools and update your inventory accordingly. This habit will keep you informed about the state of your grooming arsenal and ensure that you’re always prepared for your next grooming session.
- Why is maintaining an inventory of grooming tools important? Keeping an inventory helps you track the condition and usage of your tools, ensuring you always have what you need when you need it.
- How often should I update my grooming tool inventory? It’s a good practice to review and update your inventory every few months or after significant grooming sessions.
- What should I do if a tool is damaged? If a tool is damaged, note it in your inventory and schedule repairs or replacements as soon as possible to avoid disruptions during grooming.
Frequently Asked Questions
-
Why is it important to clean grooming tools regularly?
Cleaning grooming tools regularly is crucial because it helps prevent the buildup of bacteria and dirt, which can lead to infections or skin irritations for pets. Just like you wouldn’t want to use a dirty brush on your hair, pets deserve the same level of care. Keeping tools clean ensures a hygienic grooming experience for both you and your furry friend.
-
What is the best way to clean brushes and combs?
To clean brushes and combs effectively, start by removing any hair and debris. You can use a comb to help pull out trapped hair. Then, wash them in warm, soapy water, making sure to get into the bristles and crevices. Rinse thoroughly and let them air dry. This method keeps your tools in great shape and ready for the next grooming session!
-
How should I sanitize clippers and blades?
Sanitizing clippers and blades is essential to prevent infections. After each use, wipe down the blades with a disinfectant solution or spray designed for grooming tools. Make sure to follow the manufacturer’s instructions for the best results. This simple step can make a huge difference in maintaining the health of your pets.
-
What are the best practices for drying grooming tools?
After cleaning, it’s important to dry grooming tools properly to prevent rust. Use a clean towel to wipe off excess water, then let them air dry completely before storing. Avoid leaving tools in damp areas or in direct sunlight, as this can cause damage over time. Think of it like letting your hair dry naturally—too much heat or moisture can lead to issues!
-
What storage solutions are recommended for grooming tools?
Choosing the right storage solutions can prolong the life of your grooming tools. Consider using a dedicated grooming case, a wall-mounted rack, or drawer organizers. Keeping tools in a clean, dry place not only protects them but also makes them easy to find when you need them. It’s all about creating a tidy and efficient grooming space!
-
How can organizing grooming tools benefit me?
Organizing your grooming tools saves time and enhances efficiency during grooming sessions. When everything has its place, you won’t waste precious minutes searching for that elusive brush or clipper. Plus, an organized space can make the whole grooming experience more enjoyable for both you and your pet!
-
Why is maintaining an inventory of grooming tools important?
Keeping an inventory of your grooming tools helps you track their condition and usage. This way, you’ll know when it’s time to replace or repair a tool, ensuring that you always have what you need for effective grooming. Think of it as a personal checklist to keep your grooming game on point!

